Setting up an Amazon Cloudfront CDN
Heard of people talk about using a CDN (Content Delivery Network) to serve assets and resources to your website with? Ever thought it was too hard or complicated to set up? Well guess again, using Amazon S3 and Cloudfront is very straight forward to get set up and running. It’s also not that expensive in the grand scheme of things. If you are concerned about cost it’s probably not the thing for you, as it’s an extra cost on top of your paid hosting package. But if you want to try it out it’s going cost you cent’s rather than dollars. (I’ve been running the assets for my RSS Reader from Amazon’s CDN for the past 6 months and I am generating around 8,000 combined requests, and it’s costing me $0.09, yes that’s nine cents a month)
One thing to note is the costs will rise differently depending on how you set up you CDN distribution, and also you have to pay for the S3 storage. In total my S3 and Cloudfront bills are around $0.60 (sixty cents) a month. Regarding the CDN costs, I have mine set up to be best performance and use all Amazon locations, this meaning my assets are distributed world wide to ensure each user gets the best performance.
Depending on how you want to access your content from the CDN there are a maximum of 6 steps to follow. I am going to walk you through setting up an Amazon S3 bucket that will contain your content and then using that bucket as you CDN. This means, anything you put inside the S3 bucket will also be accessible via the CDN.
To follow the steps you will need an Amazon AWS account (http://aws.amazon.com).
- Login to your AWS account and create a new S3 Bucket and add some content to it (you can upload via the website)

- Make sure the bucket is set up for static website hosting, after creating the bucket click the bucket name, then click the “Properties” button in top right. Here you will get access to many different options you can set up to configure your bucket.

- Now go cloudfront control panel using the services menu, click “Create Distribution” – Click “Get Started” under the web option
- Choose you bucket from the Origin Domain Name (this will be the bucket you created in step 1)

- If you wish to use a custom domain for your CDN like: http://cdn.matthewroach.me/, add the domain you wish to use in the “Alternative Domain Names” input.

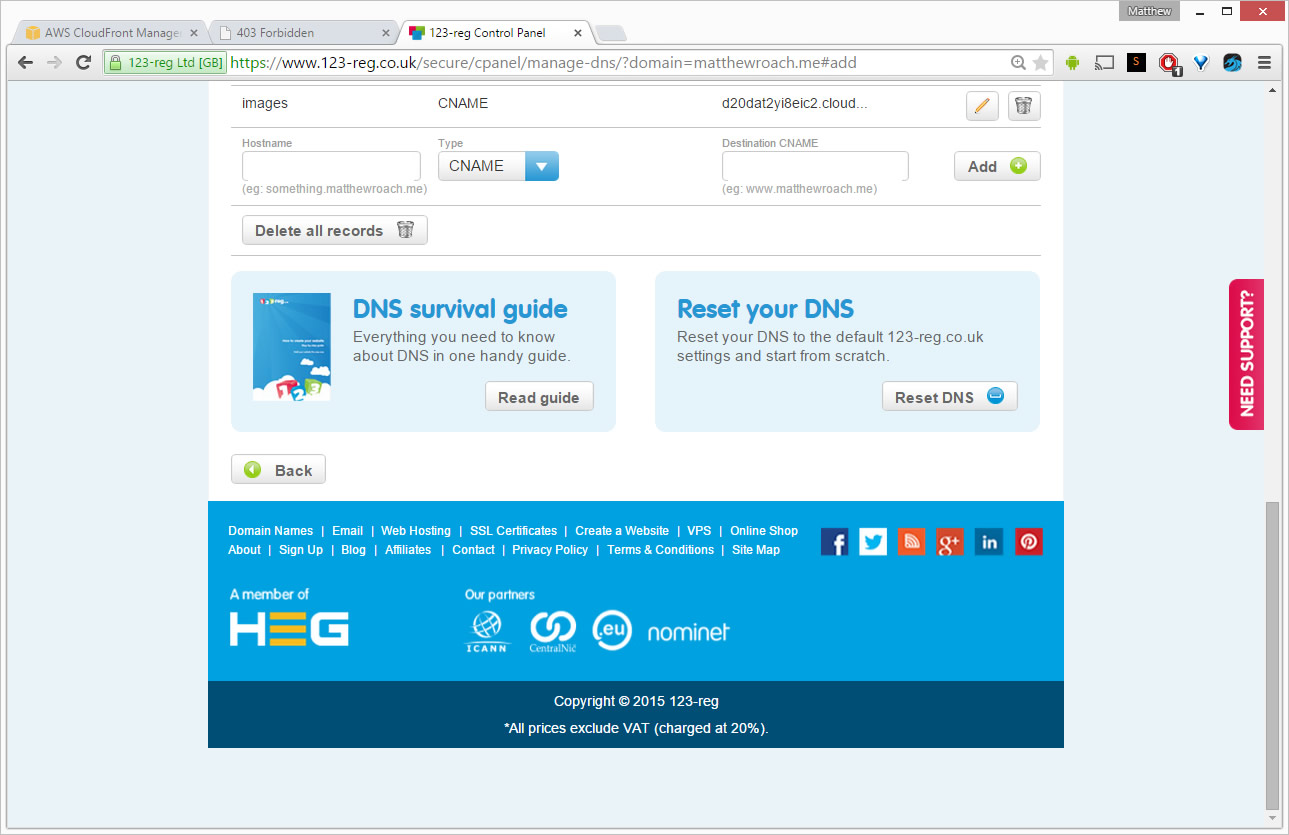
- If you did step 5 you will need to update the DNS for your domain and add a CNAME for the subdomain and point it at the origin URL that’s shown in your distribution listing
- Now you have your CDN set up you need to go back to your S3 bucket and add a bucket policy, this is in your bucket properties under the Permissions tab, click “Edit bucket policy” and add the policy shown below with the items <enter your s3 bucket here> with you bucket name.. eg. matthewroach-images

Bucket Policy
{
    "Version": "2008-10-17",
    "Id": "Policy1407892490897",
    "Statement": [
        {
            "Sid": "Stmt1407892483586",
            "Effect": "Allow",
            "Principal": {
                "AWS": "*"
            },
            "Action": "s3:GetObject",
            "Resource": "arn:aws:s3:::<enter your s3 bucket here>/*"
        },
        {
            "Sid": "2",
            "Effect": "Allow",
            "Principal": {
                "AWS": "arn:aws:iam::cloudfront:user/CloudFront Origin Access Identity E23JA8NDC54WON"
            },
            "Action": "s3:GetObject",
            "Resource": "arn:aws:s3:::<enter your s3 bucket here>/*"
        }
    ]
}
Now you have everything set up, and if you have changed DNS you may need to wait a few hours or 24 for them to take effect. But after that you can access your content using the cname or the origin domain, eg.
- https://images.matthewroach.me/blog/s3-cdn/s3-bucket-policy.jpg
- http://d20dat2yi8eic2.cloudfront.net/blog/s3-cdn/s3-bucket-policy.jpg